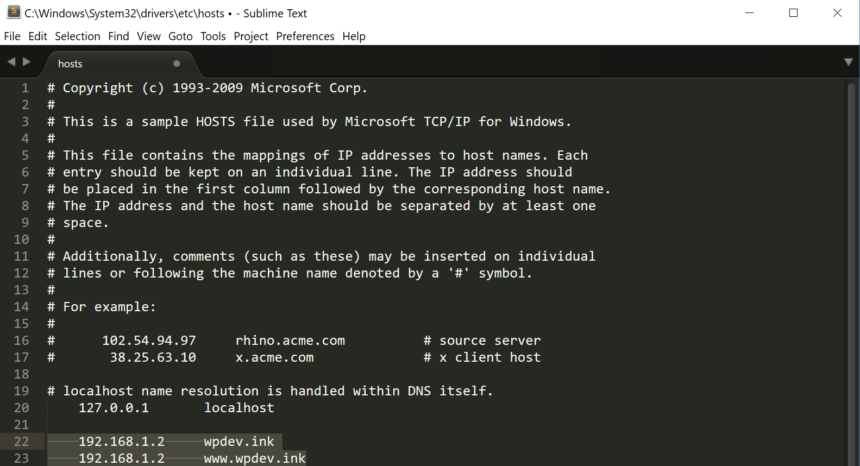
Editing the hosts file of your local computer in Windows, MacOS or Linux is perhaps the oldest method of accessing a website or app through a domain or friendly name without using a public DNS server available to anyone who consults it on the Internet.
This method also applies to the hosting industry where we have on the one hand domains that may be registered or not, or delegated to the correct DNS (or not), but in this way we can simulate that it is, for example, to verify that a site that we are moving from another server or uploading to hosting for the first time, work on rails.
What is the hosts file and how does it work?
A hosts file is a local plain text file that maps your server or friendly host names to Internet Protocol addresses. Every time you try to connect to a domain name either by trying to open it in the browser or by pinging it to see where it resolves, the operating system will reference the hosts file, so if the domain or friendly name is declared inside, then it will point to the specified IP address.
If the domain or friendly name is not declared within the hosts file, then it will fetch it from a public DNS server to try to locate which server is available to fetch the content from.
This file is organized in lines, and each line corresponds to a different entry (domain name or friendly name) composed of a numeric IP address, a space or tab character, and finally the name or domain.
If you open a hosts file you will see that it looks like this if it has a domain or name stored in it:
- 192.168.0.20 dominioejemplo.com
- 10.0.0.100 domainexample2.com
- 100.1.2.3 domainexample3.com
If I want to test a site that I uploaded to my hosting, is it mandatory to do this?
Of course not. Generally the hosting providers will be able to provide you with a URL so that you can see how your website looks like after uploading it; the thing is that since it is not the definitive URL of the domain, it may look good in that URL, but when delegating it to the corresponding DNS, Bam! It does not work as expected; and this is because the web address varies.
How to edit the hosts file
While each operating system has its own method on how to do things, the steps are quite similar to get to the same end. We will show you below how to modify or edit the hosts file of your local computer on Windows, macOS and Linux.
How to edit the Windows hosts file
1- Go to the Start menu and find Notepad. Then right click on the icon and go to Run as Administrator.
2- Now go to File > Open and open the location C:Windows System 32 Drivers. Then double click on the hosts file.
3- Find the IP address corresponding to your hosting.
4- Add the line with the info by pasting the IP first, then a space, and then the domain name as you see in this example below.
5- Save the changes and close the notepad.
How to edit the hosts file on Mac
1- Open Launchpad and find the Terminal app.
2- Type the following command and hit enter:
3- Find the IP address corresponding to your hosting.
4- Paste it in a line, give it a space and write the domain you want to point locally. It should look like this example:
5- Save the changes by pressing the Control + O keys.
6- Save the changes, and that’s it!
How to edit the hosts file in Linux
1- Open the SSH console by pressing the Control + Alt + T keys.
2- Run the command “sudo su” (without quotes), and enter the administrator password.
3- Run now “gedit /etc/hosts” (also without quotes).
4- Add the IP of your hosting to the hosts file followed by the domain name as you see in the example:
5- Save the changes, and you’re done!
Final conclusion
The local hosts file is useful if you are working on migrating your website to another hosting, or if you are developing a new website without having a delegated or registered domain name. Using this option you will be able to interact as if the site were online, and detect the most frequent problems that arise from using different preview URLs than the final ones.


